
序文
Recording a lecture is the easy part. Every phone does it. The hard part is what happens next, which for most people is nothing at all.
The recording sits in a folder. You mean to listen back. You do not, because listening to ninety minutes of a lecture you already sat through is a worse use of an evening than almost anything else. By exam season you have eleven recordings, no notes, and a vague sense of having done the responsible thing at the time.
The fix is not a better recorder. It is having a route from audio to something you will actually reread, and knowing that a transcript is not that thing either. A transcript of a lecture is ninety minutes of speech in written form, which is often longer and less useful than the lecture was.
This guide covers the whole path: permission, recording, transcribing on your own laptop rather than uploading it, and the step that turns a transcript into notes you will revise from.
Start with permission, not with the app
This is the step most guides skip, and it is the one that can actually get you into trouble.
Recording a lecture is usually fine and often encouraged. Many universities publish a policy that permits it for personal study, plenty of lecturers record their own sessions anyway, and disability and student support services routinely arrange recording as a formal adjustment.
But the policy is set by your institution, not by the app you use, and it varies more than people assume. Some departments prohibit recording seminars specifically, because the discussion includes other students who did not agree to be recorded. Some prohibit sharing a recording even where making one is allowed. Recording law also varies by country and state.
So the sequence is: check your institution's policy, ask the lecturer if the policy is unclear, and be especially careful with seminars and small-group teaching where other students are speaking. If you are registered with disability services, ask them, because a formal adjustment removes the ambiguity entirely.
What you actually need
Less than you would think.
A recorder. Your phone. The built-in voice recorder app is fine, and it is the one thing guaranteed to be in your pocket and charged. Dedicated recorders are better in a large hall, but the difference is smaller than the difference between a good and bad position in the room.
A laptop. For the transcription and the notes. This is where the work happens after the lecture.
A transcription tool that runs on the laptop. This is the choice that matters most, and the next section explains why.
That is it. No subscription to a lecture-capture service, no note-taking device, no hardware.
Why the transcription should happen on your laptop
Most transcription tools are websites. You upload the recording, their servers turn it into text, and you get a transcript back. It works, and for a lot of material it is a perfectly reasonable thing to do.
Lecture recordings have two specific problems with that.
The first is practical. A ninety-minute recording is a large file, and your upload speed at student accommodation is not the thing you want standing between you and your notes. Uploading is often slower than transcribing.
The second is about who else is on the recording. A lecture is one person talking, but a seminar is not. If your recording includes eight other students discussing an essay question, uploading it sends their voices to a company none of them have heard of, which is exactly the situation your department's policy is worried about.
Transcribing on your own machine removes both problems. There is no upload wait, and the recording stays where it already was.
Upload it to a website
You wait, and so does everyone on the recording
A large file goes up over a connection you do not control, lands on a company's servers, and sits there under a retention policy you have not read. If other students are audible on it, you made that decision for them.
Transcribe on your laptop
The file never moves
Your own machine reads the audio and writes the text. There is no upload, no connection required, and nothing to delete from anyone's server afterwards. It works in the library, on the train, and with the wifi off.
The five steps
Get permissiononce
Check the policy, ask the lecturer if it is unclear, and be careful with seminars where other students speak.
Record it well90 min
Near the front, phone flat on the desk, microphone clear, aeroplane mode on, battery and storage checked.
Transcribe locallyno upload
Import the file into Studio on your laptop. Your machine does the work, offline, and can label who spoke.
Write the actual note10 min
The transcript is raw material, not notes. Dictate a short structured summary in your own words instead.
Revise properlyall term
Search a term, ask across a whole module, or have your notes read aloud while you walk.
1. Get permission, then set up
Covered above, and worth doing before the first lecture rather than the fifth. Once you know where you stand, the rest is logistics.
2. Record the lecture properly
Recording quality decides transcription quality, and the fixes are all free.
Sit closer to the front. This is worth more than any other change. A phone six rows back records a room; a phone three rows forward records a lecturer.
Put the phone flat on the desk, microphone unobstructed. Not in a bag, not under a notebook, not face down on a soft surface. Point the bottom edge, where the microphone usually is, towards the front.
Turn on aeroplane mode. A call or a notification mid-recording is the classic way to lose a lecture.
Check battery and storage before you start. Ninety minutes of audio is not large, but a phone at four percent is.
One thing you cannot fix later: a room with bad acoustics and a lecturer who does not use the microphone. If your hall is like that, ask whether the lecture is already being recorded by the university, because many are, and the official recording will be better than yours.
3. Transcribe it on your own laptop
Move the recording to your laptop, then open Studio, the editor inside Yaps, and import the file. Studio opens ordinary audio files as well as video, so a phone recording, an official lecture capture video, or a downloaded recording all work.
Your machine does the transcription. Nothing is uploaded, no connection is needed, and there is no queue. What comes out is editable text you can correct in place, save into your notes, or export.
For seminars and discussions, switch on "Identify speakers" before you start. Studio labels who said what, which turns an unreadable block of eight people talking into a transcript you can follow. You install a small speaker-identification pack once, about 32 MB, and the labelling runs on your device like the rest of it. It is available on Windows and macOS, and it is off by default.
Correct the obvious errors before you move on. Speech recognition is good at ordinary language and weakest at exactly what a lecture is full of: technical terms, unfamiliar names, and jargon specific to your field. Fixing five terms now saves you from revising from a document that spells your central concept wrong.
4. Turn the transcript into notes you will actually reread
Here is the step that makes the difference, and the one no tool can do for you.
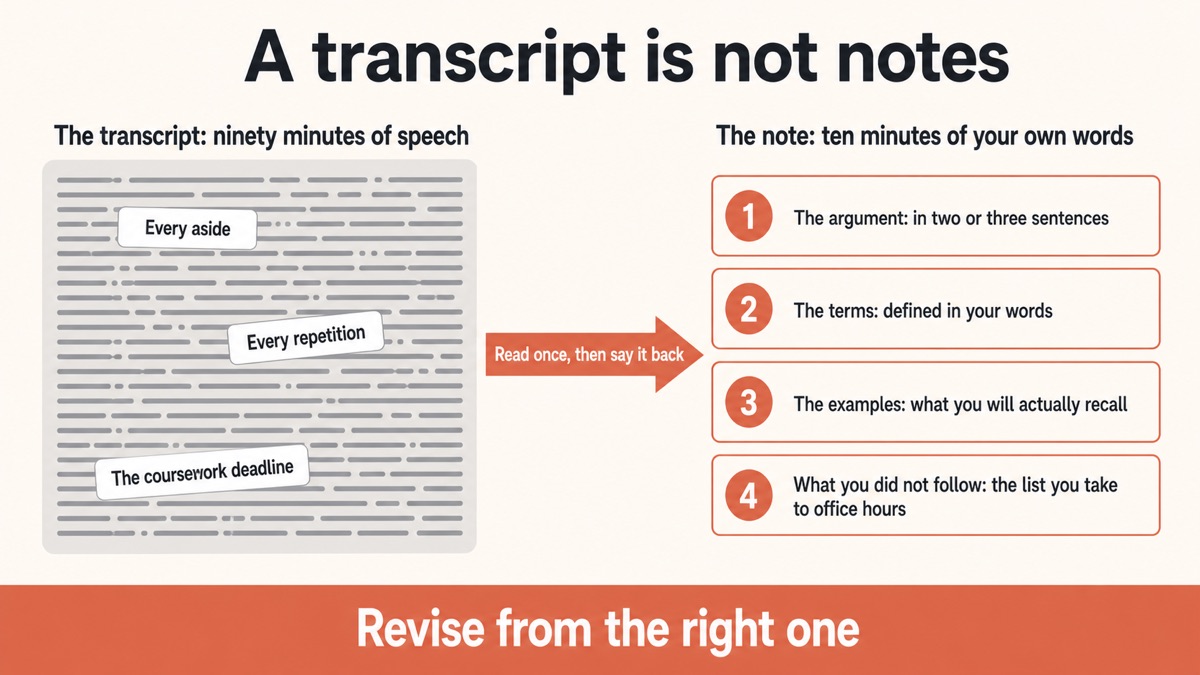
A transcript is not notes. It is a written record of speech, which means it contains every aside, every repetition, every "so what we are really saying here is", and the twenty minutes about the coursework deadline. It is longer than the lecture felt and harder to read than a textbook. If you revise from a transcript, you will revise badly.
What you want is a short note, in your own words, made while the lecture is still fresh. Read the transcript once, quickly, then press the Yaps hotkey and dictate the note. Four prompts get you most of the way:
What was the actual argument? Two or three sentences. If you cannot say it, that is the most useful thing you have learned today.
Which terms were introduced? Define each one in your own words, not the lecturer's. Using their phrasing hides the fact that you have not understood it.
What examples were used? Examples are what you will remember in an exam when the abstract version has gone.
What did you not follow? Say it out loud and write it down. This is the list you take to a seminar or an office hour, and it is the single most valuable part of the note.
Dictating this takes about ten minutes and works far better than typing it, because you are explaining the lecture rather than transcribing your own thoughts. Filler words and punctuation are cleaned up as you speak, so what lands is readable.
Keep the full transcript in the same folder. It is your reference for when the note is not enough, and searching it is faster than scrubbing through audio.
5. Revise by searching, asking, and listening
Once a term of notes exists, three things become possible that were not before.
Search when you remember a distinctive term and need the lecture it came from.
Ask across your notes when you only remember the shape. Something about the difference between two models, in one of the lectures before reading week. That question and your notes both stay on your device, so it works in the library with no signal.
Listen to your notes on the way in. Read-aloud plays a note back in a natural voice, which is a genuinely different revision pass from reading, and it is one you can do while walking. It also works for students studying in a second language, since read-aloud covers 31 languages on desktop.
The habit that makes this work
Three practical rules, from students who keep this going past week four.
One folder, one naming pattern. Module code, date, topic. Every time. An archive you can navigate in March is worth more than an archive with perfect notes you cannot find.
Do not record everything. Recording a lecture you were fully present for adds a file and no value. Record the ones that are fast, dense, in an accent you are still adjusting to, or on a topic you already know you are behind on.
Delete recordings once the note exists. The note is the artefact. Keeping ninety minutes of audio for every lecture fills your disk and creates a pile of material you will never revisit. Once the transcript and the note are written, the audio has done its job.
What this workflow does not do
Yaps never joins a live lecture as a participant, so nothing appears in the class from your side. For an in-person lecture you record with your phone and Yaps handles what happens to that file afterwards. It does not connect to your university's lecture capture system, and it does not download recordings from a virtual learning environment.
It also does not write your notes for you, which is deliberate rather than a gap. The value of step 4 is that you did it: explaining the lecture back is the thing that turns attendance into understanding. A tool that hands you a summary gives you a document and skips the learning.
There is no automatic flashcard generation and no revision scheduler. If you want those, use a dedicated spaced-repetition tool alongside this and feed it from your notes.
| What matters | Yaps | Upload-based transcription sites | Phone recorder alone |
|---|---|---|---|
| Recording stays on your device | Yes | No, uploaded | Yes |
| Turns the audio into text | Yes, on your laptop | Yes, on their servers | No |
| Labels who spoke in a seminar | Yes, on device | Usually | No |
| Works with no internet | Yes | No | Yes |
| Dictate your own notes | Yes | No | No |
| Search and ask across a term of notes | Yes, offline | Varies | No |
| Read notes back aloud | Yes, 31 languages | No | No |
A recording proves you were there. A note in your own words proves you understood it. Only one of those is revision.
Yaps for students
ショートバージョン
Check your institution's policy first, and ask the lecturer if it is unclear. Record on your phone from near the front, flat on the desk, in aeroplane mode. Transcribe on your own laptop in Studio so the file never goes anywhere, and turn on speaker labels for seminars. Then spend ten minutes the same day dictating a short note in your own words, covering the argument, the terms, the examples, and the parts you did not follow.
Start with Yaps for the transcription and the notes, because it does both on your own machine and keeps everything in plain files you can search a term later. Use an upload-based service instead if you have no laptop capable of it and the recording contains nobody but the lecturer. And use a dedicated flashcard tool alongside this if spaced repetition is part of how you revise.
よくある質問
How do I turn a lecture recording into notes?
Transcribe the recording first, then write a short note in your own words rather than keeping the transcript as your notes. Import the audio into the Studio editor in Yaps, which transcribes it on your own laptop with no upload, correct any technical terms it got wrong, then dictate a ten-minute summary covering the main argument, the key terms, the examples, and what you did not follow. The summary is what you will revise from; the transcript is your reference.
Is it legal to record a lecture?
It depends on your institution's policy and on where you are, so check before you record. Many universities permit recording for personal study and some lecturers record their own sessions anyway, but seminars are often treated differently because other students are speaking. If you are registered with disability services, ask them to arrange it formally, which removes the ambiguity. Permission to record is also not permission to share.
What is the best way to record a lecture?
Your phone is enough. Sit near the front, place it flat on the desk with the microphone edge pointing towards the lecturer and nothing covering it, turn on aeroplane mode so a notification does not interrupt, and check your battery and storage first. Position in the room matters more than the recorder you use, and no amount of processing afterwards can recover audio recorded six rows back in a bad hall.
Can I transcribe a lecture without uploading it?
Yes. Import the recording into Studio in Yaps and the transcription runs on your own computer, with no upload and no connection required. This matters for seminars in particular, where the recording includes other students who never agreed to have their voices sent to a transcription company. It is also usually faster, because a ninety-minute file takes a while to upload.
Can it tell who was speaking in a seminar?
Yes, on Windows and macOS. Switch on "Identify speakers" before transcribing and the transcript comes back with the turns labelled, which makes a group discussion readable instead of one unbroken block. You install a small speaker-identification pack once, about 32 MB, and it runs on your device. It is off by default, so you have to enable it.
Are AI study notes better than notes I write myself?
Notes you write yourself are better, and it is not close. Explaining a lecture back in your own words is the step where understanding actually happens, and a generated summary skips it entirely, leaving you with a document you have never really engaged with. The useful role for a tool here is removing the tedious parts, so transcription and cleanup are automated and the thinking stays yours.
Should I keep the full transcript?
Yes, alongside the note but not instead of it. The transcript is your searchable reference for when the note turns out to be too thin, and finding a phrase in text is far quicker than scrubbing through audio. Just do not revise from it, because a transcript of speech is longer, messier, and harder to learn from than a page of your own notes.
How long does this take per lecture?
About ten to fifteen minutes of your time after the lecture, plus whatever the transcription takes while you do something else. Most of that is step four, the note. It is a much smaller commitment than listening back to a ninety-minute recording, which is the alternative most people intend and then never do.
Can I record and take notes on my phone?
You can record on your phone with its built-in recorder and dictate notes on it too, since Yaps on Android includes a keyboard with voice typing that runs on the device. The transcription step is a desktop feature: Studio and its file import live in the app on Windows, macOS, and Linux. Optional note syncing brings notes made on the phone to your laptop. An iPhone and iPad version is coming soon.
Does Yaps join my online lectures and record them?
Not as a participant. Yaps never joins a class, never appears in the attendee list, and does not connect to your university's lecture capture system or download recordings from a virtual learning environment. For an in-person lecture you record on your phone and import the file. For an online one, the desktop app can record locally from your microphone and your computer's own audio, which stays on your machine like everything else. Your institution's policy on recording applies either way.
Will it get technical terms right?
Ordinary language transcribes well, and technical vocabulary is where every speech tool is weakest, so plan to correct it. Unfamiliar names, field-specific jargon, and abbreviations are the usual casualties. Fixing them right after transcription takes a couple of minutes and matters, because revising from notes that misspell your central concept is worse than having no notes.
Can I listen to my notes instead of reading them?
Yes. Read-aloud plays a note back in a natural voice, which is a genuinely different revision pass and one you can do while walking or on a bus. Yaps has 18 voices on desktop, 8 of which need no connection, and read-aloud covers 31 languages, which helps if you are studying in a second language and want to hear your notes in either one.
What does it cost for students?
On a laptop, where the transcription happens, Yaps starts with a 7-day free trial and then costs $15 a month for Pro or $25 for Max. Yaps on Android has a free tier covering voice typing, voice notes, and read-aloud, so the phone half of a student workflow costs nothing. If you are choosing between tools, our roundup of the best AI study apps compares several options including free ones, and the guide to dictation software for students covers the voice-typing side specifically.